How to Organize Desk Drawers So Everything Has a Place
Empty, sort, measure and divide: a step-by-step way to turn jumbled desk drawers into fixed compartments, with a job for each drawer and a strict limit for the odds and ends.
At a glance
What you need
- Tape measure
- Paper and pencil
- Small open boxes or trays for a trial layout
- Drawer dividers or an expanding tray
- Non-slip drawer liner
- Cleaning cloth
A desk drawer turns into a jumble for a plain mechanical reason: it is an open box, and every time it is pulled or pushed the contents slide toward one end. If you want to know how to organize desk drawers so the layout survives daily use, the answer is to divide the space into fixed compartments sized to what you actually keep.
The method below takes one drawer at a time. Allow about 30 to 45 minutes for the first and less for each one after, since the sorting groups carry over.
What to gather
- A tape measure or ruler
- A sheet of paper and a pencil
- A cleaning cloth
- Small open boxes, lids or trays from around the house for a trial layout
- A non-slip drawer liner, cut to size, if the drawer base is smooth
- A bag for trash and a box for things that belong elsewhere
Hold off on buying a drawer organizer until step five. Until you have measured and sorted, you cannot know which sizes you need.
Decide what each drawer is for
Before emptying anything, give each drawer one job based on its position. A typical three-drawer desk divides like this:
| Drawer | Job | Typical contents |
|---|---|---|
| Top (shallow) | Daily tools | Pens, scissors, stapler, sticky notes, tape, a charging cable |
| Middle | Supplies in use | Envelopes, notepads, a box of staples, spare sticky notes |
| Bottom (deep) | Files or bulky items | Hanging folders if the drawer has rails, or a hole punch, label maker and other large tools |
If your desk has a single drawer, it is the daily-tools drawer and nothing else. Supplies then live beside the desk; the list of desk organization ideas includes a cart and other options for that overflow.
Step by step: empty, sort and fit
- Empty the drawer completely. Tip everything onto the desk or a towel on the floor. Wipe the inside, including the corners where staples and grit collect.
- Sort into groups. Put like with like: writing tools, cutting and sticking tools, clips and fasteners, paper pads, cables, and items that do not belong in a desk at all.
- Discard and reduce. Throw out dried pens, bent clips and empty tape rolls. Where you find duplicates, keep one in the drawer and send the rest to your supply stock. Anything that belongs in another room goes in the box.
- Measure the inside. Note the width, the depth from front to back and the usable height below the desk frame. Check whether the drawer opens fully; if it stops short, the back few inches are hard to reach and count as storage for rarely used things only.
- Plan the compartments on paper. Draw the drawer as a rectangle and sketch a compartment for each group, sized by laying the group out on the desk and measuring it. Place the groups you use most at the front.
- Test with what you have. Arrange small boxes, lids and trays in the drawer to match the sketch. Use it for a few days. Adjust anything that feels awkward before buying or cutting permanent dividers.
- Fit the liner and dividers. Lay the liner first so compartments do not skate around. Then set in adjustable dividers, an expanding tray or the open boxes that passed the test. Push them tight against each other and the drawer sides so there are no gaps to shift into.
- Load front to back. Most used at the front, least used at the back. Close and open the drawer a few times briskly to check that nothing slides or jams.
Laying out the top drawer
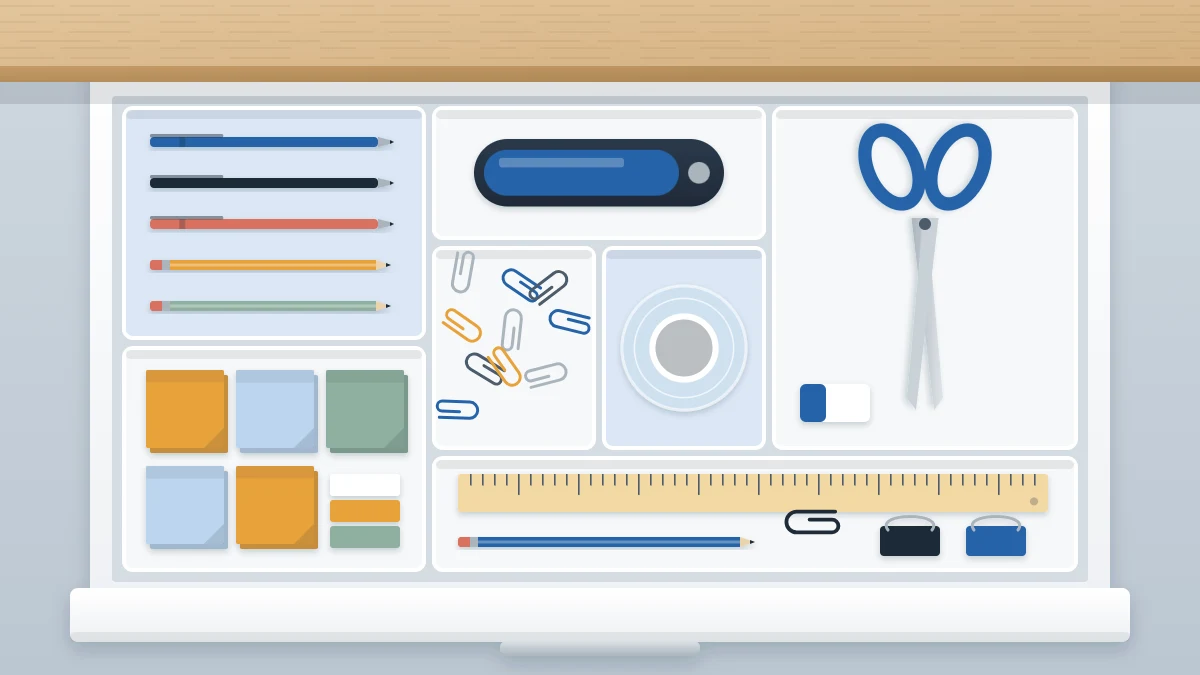
The top drawer earns the most care because you open it many times a day. A layout that works for most people:
- Front, on your dominant side: the two or three pens you reach for, plus a pencil.
- Front, other side: sticky notes and a small pad.
- Middle: scissors, stapler and tape, each in its own slot so one can be lifted without disturbing the others.
- Back: spare staples, a ruler laid along the back edge, the charging cable coiled loosely.
Keep everything in a single layer. The moment items are stacked in a shallow drawer, the lower layer is forgotten and the drawer begins to catch on what is piled inside.
Middle and bottom drawers
The middle drawer holds flat supplies well. Stand envelopes and notepads on their long edge in a narrow box, like files, so you can flip through them instead of lifting a stack. Keep only the amount you will use in the coming weeks here and store the rest with your main stock; the guide to office supply storage ideas covers where that stock can live.
A deep bottom drawer with rails takes hanging folders, tabs facing up, the most used folder at the front. Without rails, use it for bulky tools, each standing upright or in its own open box so they do not tumble together. Put heavier things here, not higher up, so the drawers stay easy to pull.
The “odds” compartment and its limit
Every desk collects a few things with no category: a spare key, a loyalty card, a single battery, a button. Refusing them a place only sends them to the desk surface. Instead, give them one small compartment, about the size of your palm, in the top drawer.
The compartment has one rule: it never grows. When it is full, empty it and deal with each item before adding more. That limit is what separates an odds compartment from a junk drawer.
Tip
If several people use the desk, or the drawers look alike from outside, a small label on each drawer front saves opening all three. The guide to building a home office labeling system covers wording and placement.
Adapting to different drawers
Very shallow pencil drawer: use a single flat tray with long slots and store only pens, a ruler and thin pads. Anything taller goes elsewhere.
One large deep drawer: stack two layers on purpose. A sliding tray on top holds daily tools, and the space beneath holds supplies in open boxes. Measure the height carefully so the tray clears what sits below.
Keeping the layout in place
A divided drawer mostly maintains itself, because an item out of place is obvious. Two small checks help. When something new arrives, decide which compartment it joins before it goes in. And every few months, lift the dividers out, wipe the liner and remove whatever has crept in. If one compartment is always overflowing, the group has outgrown it: either trim the group or redraw the plan to give it more room.
Frequently asked questions
What should go in the top desk drawer?
Only the tools you use on most working days: a few pens and a pencil, scissors, a stapler, tape, sticky notes and perhaps a charging cable. Keep them in a single layer, each in its own compartment, with the most used at the front. Refills and backups belong in a lower drawer or with your supply stock.
Do I need to buy a drawer organizer?
Not at first. Small boxes, jar lids and trays you already have will hold a trial layout for a few days. Once the arrangement works, measure the inside of the drawer and choose adjustable dividers or an expanding tray that fits it closely, so the compartments cannot shift.
How do I stop things sliding around in a drawer?
Lay a non-slip liner on the drawer base, then fill the whole footprint with compartments that press against each other and the drawer sides. Gaps are what allow movement. Keeping items in one layer and avoiding overfilling also stops the contents from tumbling when the drawer is opened.