Pegboard Office Organizer: Plan and Arrange a Wall Board
Plan a pegboard for the wall above your desk before you hang it: measure your reach, list what will live there, lay it out flat, group by task and leave gaps for change.
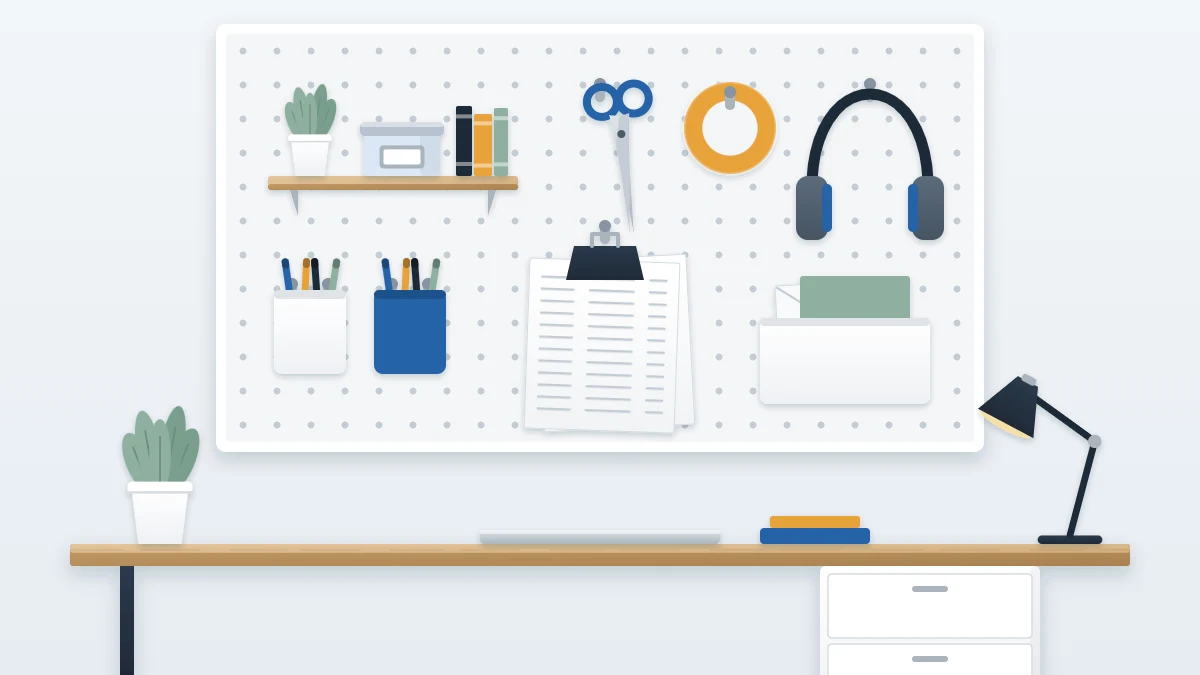
At a glance
What you need
- Tape measure, pencil and paper
- Painter's tape
- Pegboard with its supplied fixings and instructions
- Hooks, cups, clips and a small shelf made for the board
- The items you plan to hang
The wall above a desk is usually empty, while the desk below it is crowded with scissors, tape, headphones and cups of pens. A board with movable hooks puts those small tools in view and off the surface, and lets you rearrange them whenever your work changes.
A pegboard office organizer works well only if it is planned before anything goes on the wall. Decide what will hang on it, lay the whole arrangement out flat, and settle the positions while changes are still easy. The planning takes about an hour and saves a board that ends up half empty in one corner and overloaded in another.
Step 1: Gather the parts and measure the wall above the desk
You will need:
- Tape measure, pencil and paper
- Painter’s tape
- The board and the accessories made for it: hooks, cups, clips, a small shelf
- Every item you plan to hang
- The fixings and instructions supplied with the board, if it is going on the wall
Then measure:
- Sit at the desk in your normal position and reach forward and up. Mark the highest point you can touch comfortably with a strip of painter’s tape.
- Measure the width of clear wall above the desk, staying inside the edges of the desktop.
- Measure from the top of your monitor or lamp, whichever is taller, up to the tape mark. This is your prime zone.
- Note anything in the way: a window frame, a light switch, a shelf.
- Outline the board’s planned position on the wall with painter’s tape and live with it for a day.
The bottom edge should sit above the monitor and clear of the lamp. A board wider than the desk leaves its outer columns out of reach, so match it to the desktop or go a little narrower.
Step 2: List what will live on the board
Collect the candidates from the desk and drawers and write them down. A board suits light, frequently used office items with a shape that hangs or sits in a cup:
- scissors, a ruler, a roll of tape, a hole punch
- headphones, a lanyard, keys
- pens, markers and highlighters in cups
- sticky notes, paper clips and binder clips in a small bin
- a clip holding a few current sheets, a calendar or a list
Leave heavy things off it. Reams of paper, thick books, the printer and full binders belong on a low shelf or the floor-level unit. So do supplies you use once a month. If your list turns out to be mostly boxes and books, shelves are the better tool. See how to arrange home office shelves by reach and use instead.
Step 3: Lay it out flat on the floor first
Put the board on the floor or a table, the way it will face on the wall, and build the arrangement lying down. Nothing is under load, hooks can be moved in seconds, and you can stand back to judge the result.
- Fit the hooks, cups and small shelf roughly where you think they should go.
- Place each real item on its hook or in its cup.
- Check that neighbors do not overlap and that each item can be lifted off without knocking the next.
- Shift things until the layout is balanced, with no cluster in one corner.
- Take a photo with your phone or sketch the layout on paper, so you can rebuild it once the board is up.
Step 4: Group by task and put the most used lowest
Arrange the board in small neighborhoods so your hand learns one area for each kind of job:
- Writing: pen cups, markers, sticky notes.
- Cutting and fixing: scissors, tape, ruler, stapler on the small shelf.
- Listening and calls: headphones on a wide hook, away from sharp tools.
- Current paper: one clip for the sheets in use this week.
Then order by height. The bottom row, just above the monitor, is the easiest to reach while seated, so it takes the things you grab many times a day. The middle rows take weekly items. The top row, where you have to stand, takes light things you seldom need or something decorative.
Keep pointed tools with the points down or inside a cup.
Step 5: Leave gaps for change
A board filled edge to edge cannot adapt, and adapting is the reason to choose one. Leave about a quarter of the holes empty, spread across the board. A new tool then has a place without a full rearrangement.
Tip
Keep the spare hooks in a small cup on the board itself. When you want to add or move something, the hardware is already there.
Step 6: Put the board up
Remove the items and accessories, put the board up empty, then rebuild the layout from your photo or sketch.
Safety note
Follow the manufacturer’s instructions and stated limits for the board, its spacers and every hook, cup and shelf, and use fixings suited to the type of wall you have. If you are not sure what the wall is made of or what lies behind it, ask a qualified tradesperson before drilling. If you rent, check your lease or ask your landlord first, or choose one of the freestanding options below. Hang light office items only and keep heavy things on low shelves.
Options that need no holes in the wall
Renters and anyone who prefers to leave the wall alone have three good choices:
- A desk-clamp board: a panel on a frame that clamps to the back edge of the desk. Check the clamp range against your desktop thickness and fit it as its maker describes.
- A freestanding board: a panel with feet that stands at the back of the desk or on a shelf.
- A leaning board: a larger framed board that rests on the desk or floor and leans against the wall. Make sure the base cannot slide and keep the load light and low.
All three use the same planning steps. If the desk also lacks drawers, pair the board with the storage ideas for a desk without drawers.
Keeping the board useful
Every item should return to its own hook. If something keeps landing on the desk instead, its hook is in the wrong place, so move the hook.
Refills and backup stock do not belong on the board. Keep one of each item there and the rest with your other supplies, arranged with these office supply storage ideas.
Frequently asked questions
What should I put on a pegboard above a desk?
Light office items you use often and that hang or sit in a cup: scissors, tape, a ruler, headphones, pens and markers, sticky notes, clips and a few current sheets of paper. Keep heavy things such as paper reams, books and full binders on a low shelf instead.
Can I use a pegboard if I rent?
Yes. Check your lease or ask your landlord before putting anything on the wall. If drilling is not allowed, use a board that clamps to the back edge of the desk, a freestanding panel with feet, or a larger framed board that leans against the wall with a base that cannot slide.
How high should a pegboard sit above the desk?
Its bottom edge should clear the top of your monitor and lamp, and most of the board should fall within the area you can touch while seated. Sit at the desk, reach up, mark that point with painter's tape and plan the board between the monitor and the mark.